Product List
Software Testing
Please download Test resources to test & compare Moyea SWF To Video Converters with other SWF converters!
1. Music flash controlled by script:
Download Beautiful.swf
2. Interactive game flash:
Download GangsterPursuit.swf
Download CrusaderTrank.swf
More test resources and info...
How to convert SWF to FLV?
What is FLV?
FLV, or Flash Live Video file, is a preferred file format that is designed for
web playback, offering high rates of compression to deliver video over the
Internet using Adobe Flash Player.
FLV content cannot be played back directly but must be embedded in (or linked from) an SWF file. You create (or download) a "container" SWF file from which to play the FLV file. The most common approach is to use an SWF file that functions as a media player with screen and playback controls. Notable users of the FLV format include YouTube, Google Video, Reuters.com, Yahoo! Video and MySpace.
What is SWF?
The SWF file format (pronounced "swiff") delivers vector graphics, text, video, and sound over the Internet to AdobeFlashPlayer software. The SWF file format is designed to be an efficient delivery format, not a format for exchanging graphics between graphics editors. It is designed to meet the goals of On-screen display, Extensibility, Network delivery, Simplicity, Scriptability, Speed, Scalability.
Moyea SWF4Tube ( SWF to FLV Converter) is a handy utility that can perfectly convert Macromedia SWF to FLV, AVI, SWF to MPEG, MOV, FLV, 3GP movie (3GPP/3GPP2), MP4 (iPod video, iPhone video and PSP movie), WMV (Zune movie and Pocket PC movie), etc, with excellent picture quality and sound quality for sharing and private entertainment. The Converter is a professional tool for personal use and educational purpose.
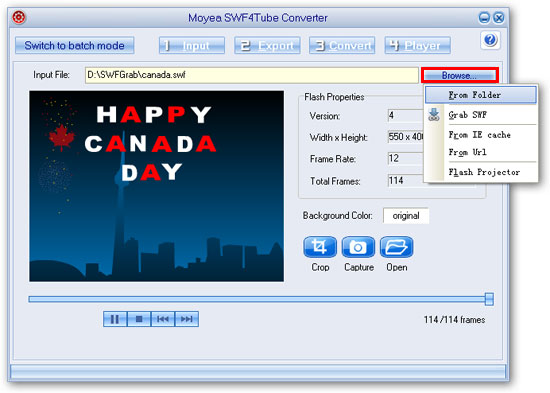
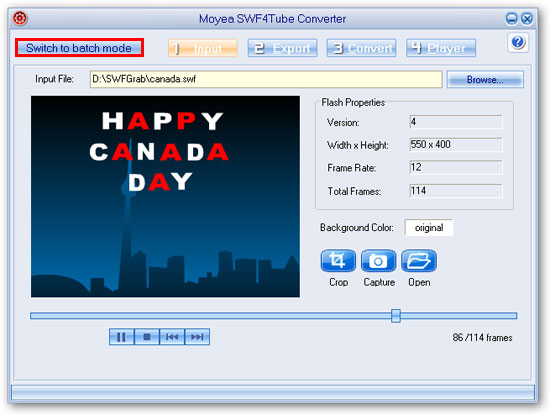
How to Convert SWF to FLV by Moyea SWF4Tube ( SWF to FLV Converter ) ?1. Input Flash Files:
①Click "Browse…"tab to input flash files from your computer folder. Click "V" immediately behind, a drop list will cascade automatically. Choose among "From Folder", "From IE cache" and "Flash Projector", and there will be a dialog box accordingly pops up. Choose files in those dialog boxes and click "OK". On the right of pane are the properties of current playing flash.
Tips: On opening the window, you will get "Single Mode" conversion, if you have many files to convert; you are suggested to choose "Batch Mode" on the top left.
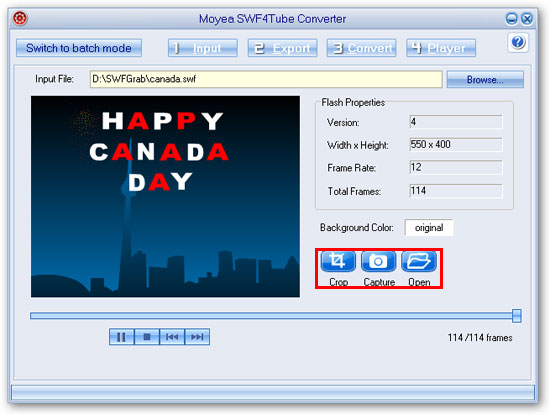
2. Capture Pictures
Click "Original" in Background Color box, there will pop up a pigment pane, you can select one color or just DIY a color for your video background. Click "Camera" tab to capture pictures of the playing flash, and captured image files will be saved as JPEG format files. Click "folder" on the right to check for its saving folder. You can click the button continuously for pictures, and check them together. Click "Export" to make settings for export!
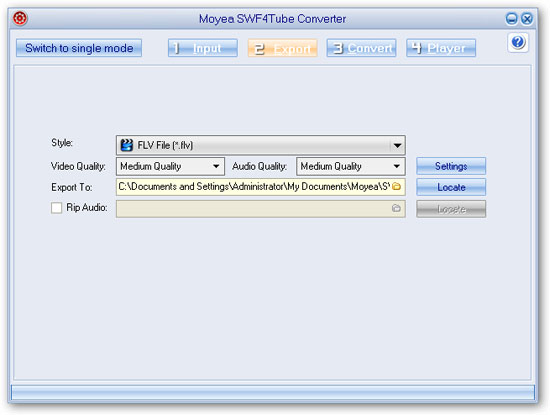
3. Export Settings
Click "Export" tab in menu, and you will get the following windows.
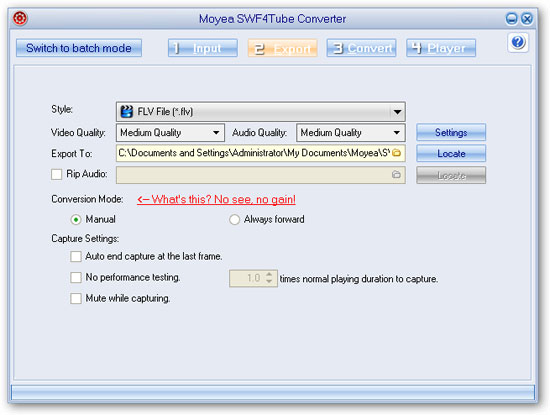
- Profile selection: Click drop-down button so that a drop list will cascade. Select your export file format from it. Here 8 profiles are available for you to choose to meet your specific needs!
- Set the export destination folder: Click the folder in the "Export to" box to set the output destination, and click the "Locate" button, the destination folder will pop up immediately.
- Rip the audio: Check the "Rip Audio" box, and the audio will be extracted and generated as a single file. Click the "folder" on the right to browse for the audio destination folder, and click the "Locate" button, the destination folder will pop up itself.
- Select conversion mode: By selecting "Manual", you can interact in the conversion process by setting the capture start and end points while selecting "Automatic" mode, the conversion will process automatically.
- Make some conversion settings:
(1). If you like, you can set "auto end capture at the last frame". But please note that if this option valued, the last frame of the flash file would not be captured to convert.
(2). If you are familiar with the flash file and better know the best capture speed for the best output quality, you can check the "No performance testing" option to directly specify a capture speed.
(3). "Mute while capturing" allows you mute the file when capture flash file for conversion.
Note: The manual mode conversion can help guarantee a better result. It is highly recommended for the interactive or Ascript controlled flashes with few frames.
Click the "Convert" tab in the menu to convert the files.
4. Conversion
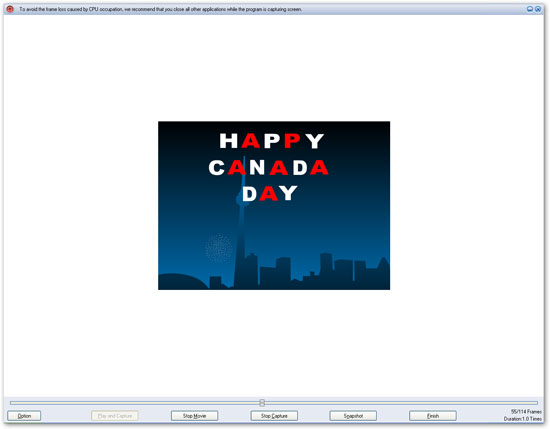
①Click "Convert" in the menu, the program will automatically start performance test to find the best capture speed, if you did not checked "No performance testing". To guarantee an accurate result, you are suggested to interact with the flash when it asks you to.
②After performance testing, the program will come with the capture interface, then you can process your manual capture flash file for conversion.
![]() : Performance testing & Stopped frame.
: Performance testing & Stopped frame.
Performance testing: If you have valued "No performance testing" in the "Export" interface and if you want to test the performance again, you can click this button and choose "Performance testing" to test the performance.
Stopped frame: you can click it to set the stopped frame to capture the flash to convert, but please note that the contents of the specified stop frame can not be captured to convert.
![]() : Click it to start play and capture the contents for conversion simultaneously.
: Click it to start play and capture the contents for conversion simultaneously.
![]() : Click it to play the flash without capture. The button will auto change to
: Click it to play the flash without capture. The button will auto change to ![]() after play movie valued, then you can click "Stop Movie" button to stop playing the flash.
after play movie valued, then you can click "Stop Movie" button to stop playing the flash.
![]() : Click it to start capture the flash to convert if you like. The button will auto change to
: Click it to start capture the flash to convert if you like. The button will auto change to ![]() after start capture valued, then you can click this button to stop capture the contents to convert.
after start capture valued, then you can click this button to stop capture the contents to convert.
![]() : Click it to capture any current frames of the playing flash file to save as JPEG, BMP and THM format. Just like the function of
: Click it to capture any current frames of the playing flash file to save as JPEG, BMP and THM format. Just like the function of![]() , but the captured picture would be bigger than the former mentioned.
, but the captured picture would be bigger than the former mentioned.
![]() : Click it to finish capture flash for conversion or exit the capture window. If you did not start capture at all, click this button will exit the conversion, and there would be prompt; if you have started capture and clicked this button, the program will only can convert the captured contents to convert, the other contents would not be able to handled. Besides, the output file may not be able to play if the captured contents are too short. Another prompt would be also occurred.
: Click it to finish capture flash for conversion or exit the capture window. If you did not start capture at all, click this button will exit the conversion, and there would be prompt; if you have started capture and clicked this button, the program will only can convert the captured contents to convert, the other contents would not be able to handled. Besides, the output file may not be able to play if the captured contents are too short. Another prompt would be also occurred.
Then, the encoding process starts, and after a while, the conversion will complete. Confirm the "Conversion Success" and the output folder will pop up automatically. Now the rest is to enjoy your fancy!
After complete the conversion of SWF to FLV or SWF to MP4, you can click the tab ![]() to help you link to Moyea Web Player if you have installed this web player; if not, click this button will guide you to our website https://www.flash-video-mx from where you can download a demo Moyea Web Player or purchase it. With this player, you can customize your own flash video player for your web, blog, podcast, etc.
to help you link to Moyea Web Player if you have installed this web player; if not, click this button will guide you to our website https://www.flash-video-mx from where you can download a demo Moyea Web Player or purchase it. With this player, you can customize your own flash video player for your web, blog, podcast, etc.
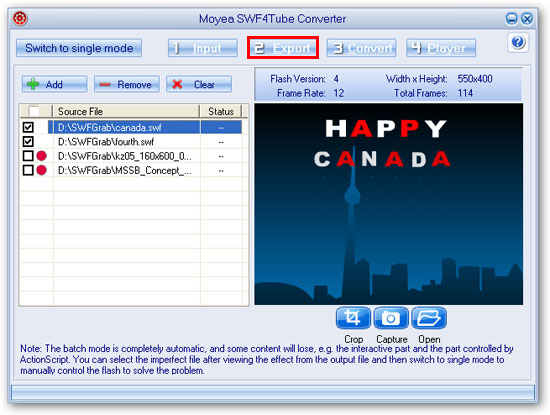
Well, the above instructions are for the single mode, and the converter can also convert files in batch mode in a much easier way, for it consists of only three steps!
On Opening the software, you will get this window for single mode conversion, click "Batch Mode" on the top left to shift to batch mode conversion.
All are the same with the single mode files inputting, except that you can click each file name to play in the dialog box, and then select the check box before the items you want to convert. Of course, you can click "Check All" to select all, "Uncheck All" to delete all the selected. Choose "Invert" for the items selected. Then, click "OK" to confirm. Click each file name to play, during the playback, click the "Camera" to capture a picture, and the "Folder" to check the saving folder.
Click "Export" in the menu for the export settings.
Note: As batch mode is default with the automatic conversion mode, some of the interactive or AScript controlled flashes with few frames may not be processed perfectly. It is recommended to shift this kind of files to "Single Mode" to convert under "Manual Mode" for a better result.
2. Export Settings
All the same to the "Single Mode", except that you don't have to select conversion mode, as batch mode is default with automatic conversion.
Then the program will move on to test the screen capturing speed, and encode one by one. Through this process, you can operate the un-grey buttons to make operations, including stop capture, stop play, snapshots, finish, etc. After complete playing and capture the flash file for conversion and you do not intervene to it, the program will automatically start conversion one by one!
3. Conversion:
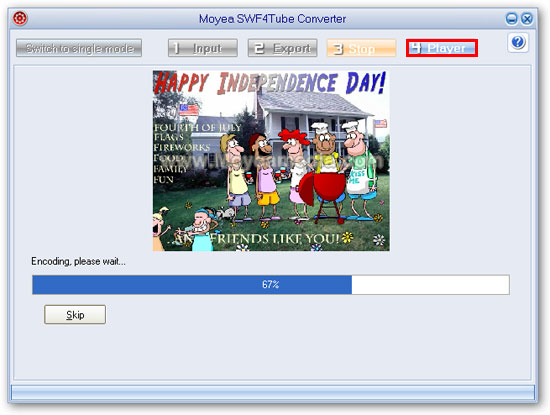
Now, the conversion is completed. Confirm the "Conversion Success" and the output folder will pop up automatically. Now the rest is to enjoy your fancy!
Now you can click